We designed our hovercraft with raw functional performance in mind. We wanted to build a hovercraft that was not only solidly built and stable, but also fast, maneuverable, and, above all, fun to drive. In the process, we created something that met and exceeded all of our wildest expectations.
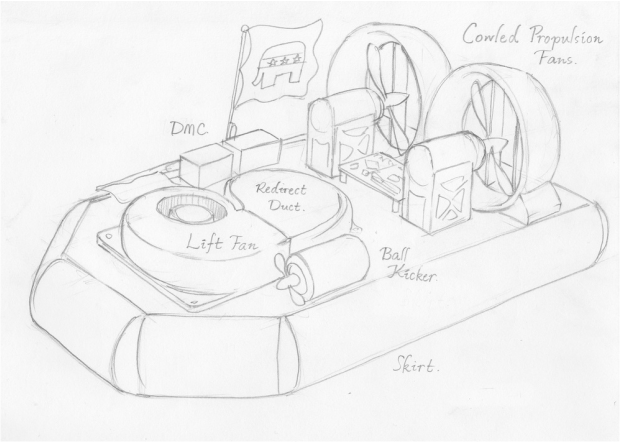
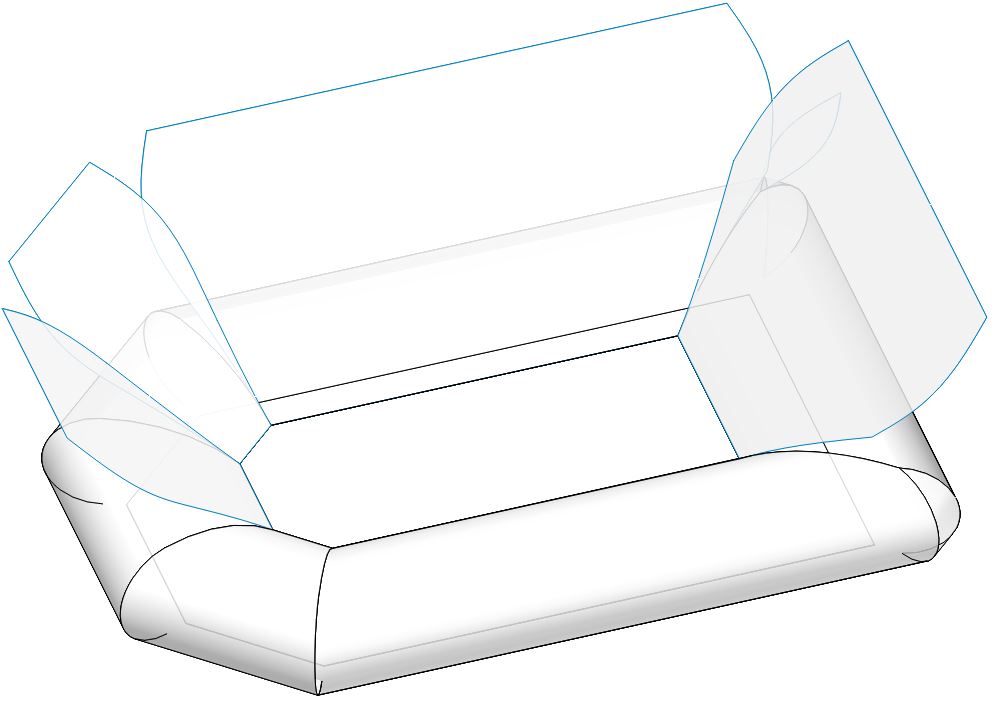
A concept-stage design sketch, showing the final adopted design
|
Early ConceptsWe started our design process by looking for inspiration, using the Internet to research past ME218C projects and real-life hovercraft. This process gave us an idea of the advantages and disadvantages of various designs.
After some discussion, we opted for an ambitious design featuring a 'bag skirt' - an approach commonly found on racing hovercraft. The bag skirt approach strikes a balance between performance and simplicity, falling between the extremes of the wall skirt (simpler, less stable) and the finger skirt (more complex, higher overall performance). We also decided on a low profile design for the hovercraft to keep the center-of-lift and center-of-thrust close to the center-of-mass. |
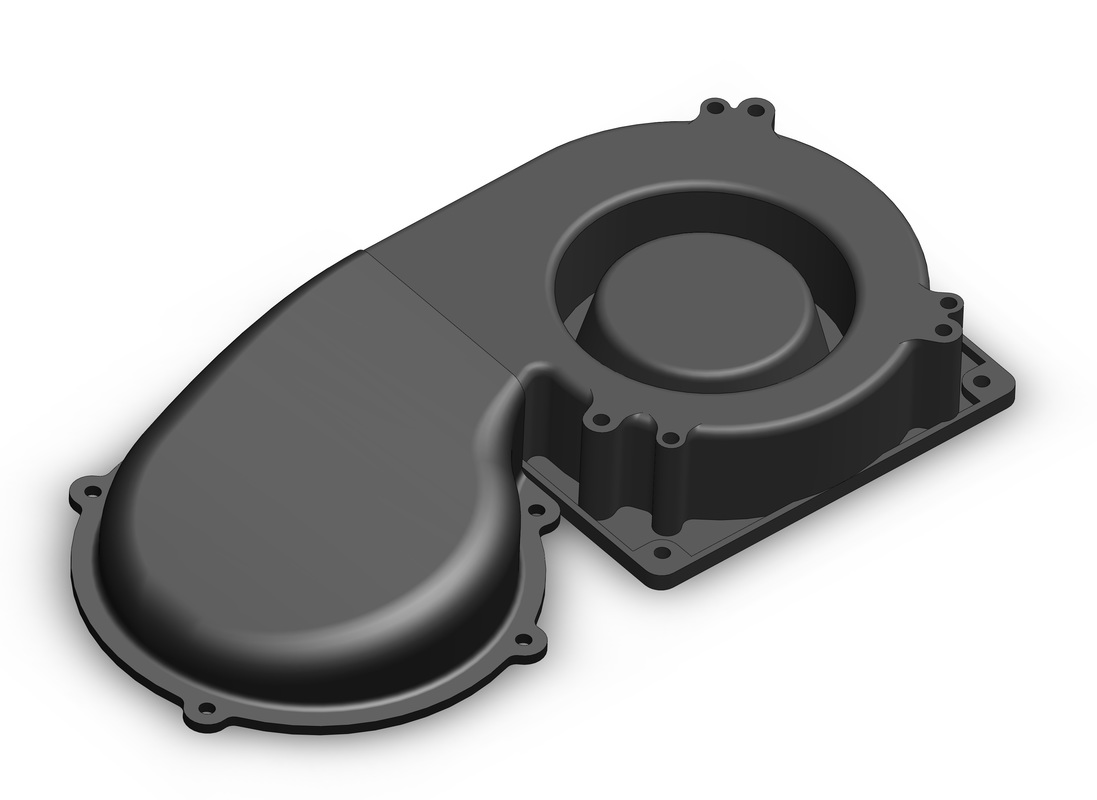
First Prototype; Achieving HoverThe first major obstacle for our low-profile design was that the lift fan provided for our project - a Delta blower - had its output perpendicular to its fan axis. Inspired by several successful 218C hovercraft of years past, we designed a custom duct to redirect airflow downwards in a way that does not lead to excessive pressure drop (i.e. no sharp turns).
We then threw together a rapid prototype - our Mark 1 prototype - with some cardboard, a trash bag, staples, and tape. This early prototype featured a simple wall skirt and was intended solely to test the lift capabilities of the Delta blower. The test was a resounding success, easily lifting 20 lbs of weight. |

|

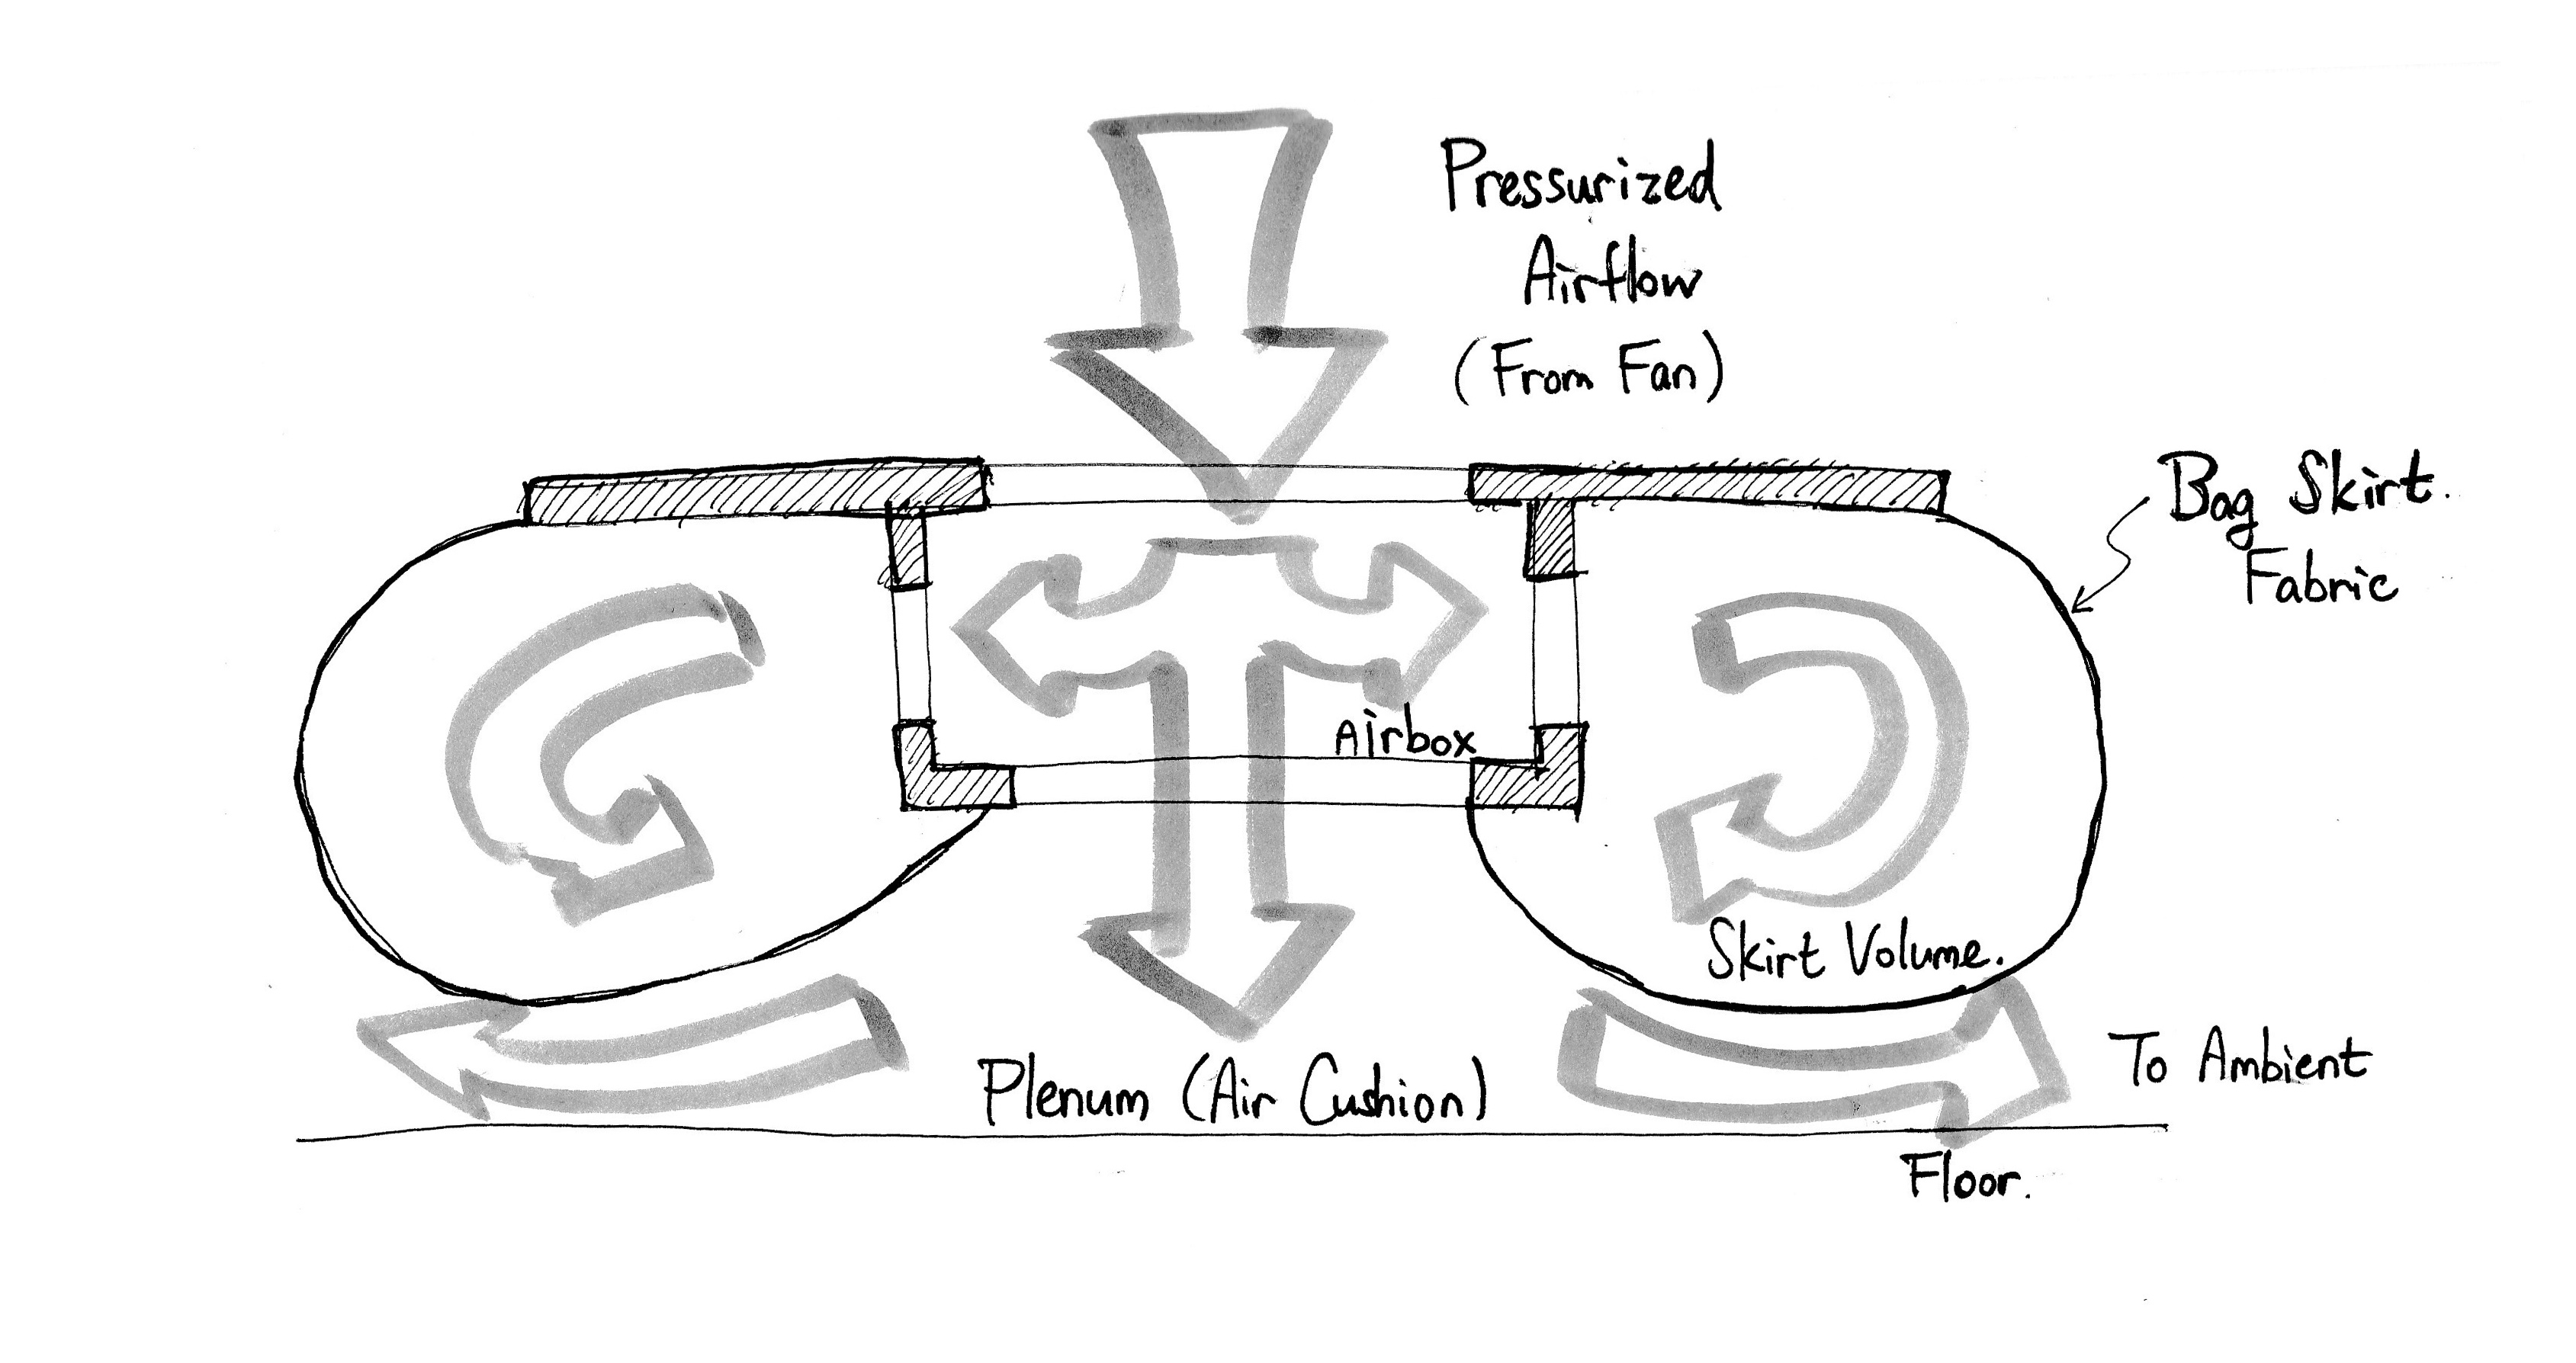
Cross-section schematic of the bag-skirt approach used for our hovercraft
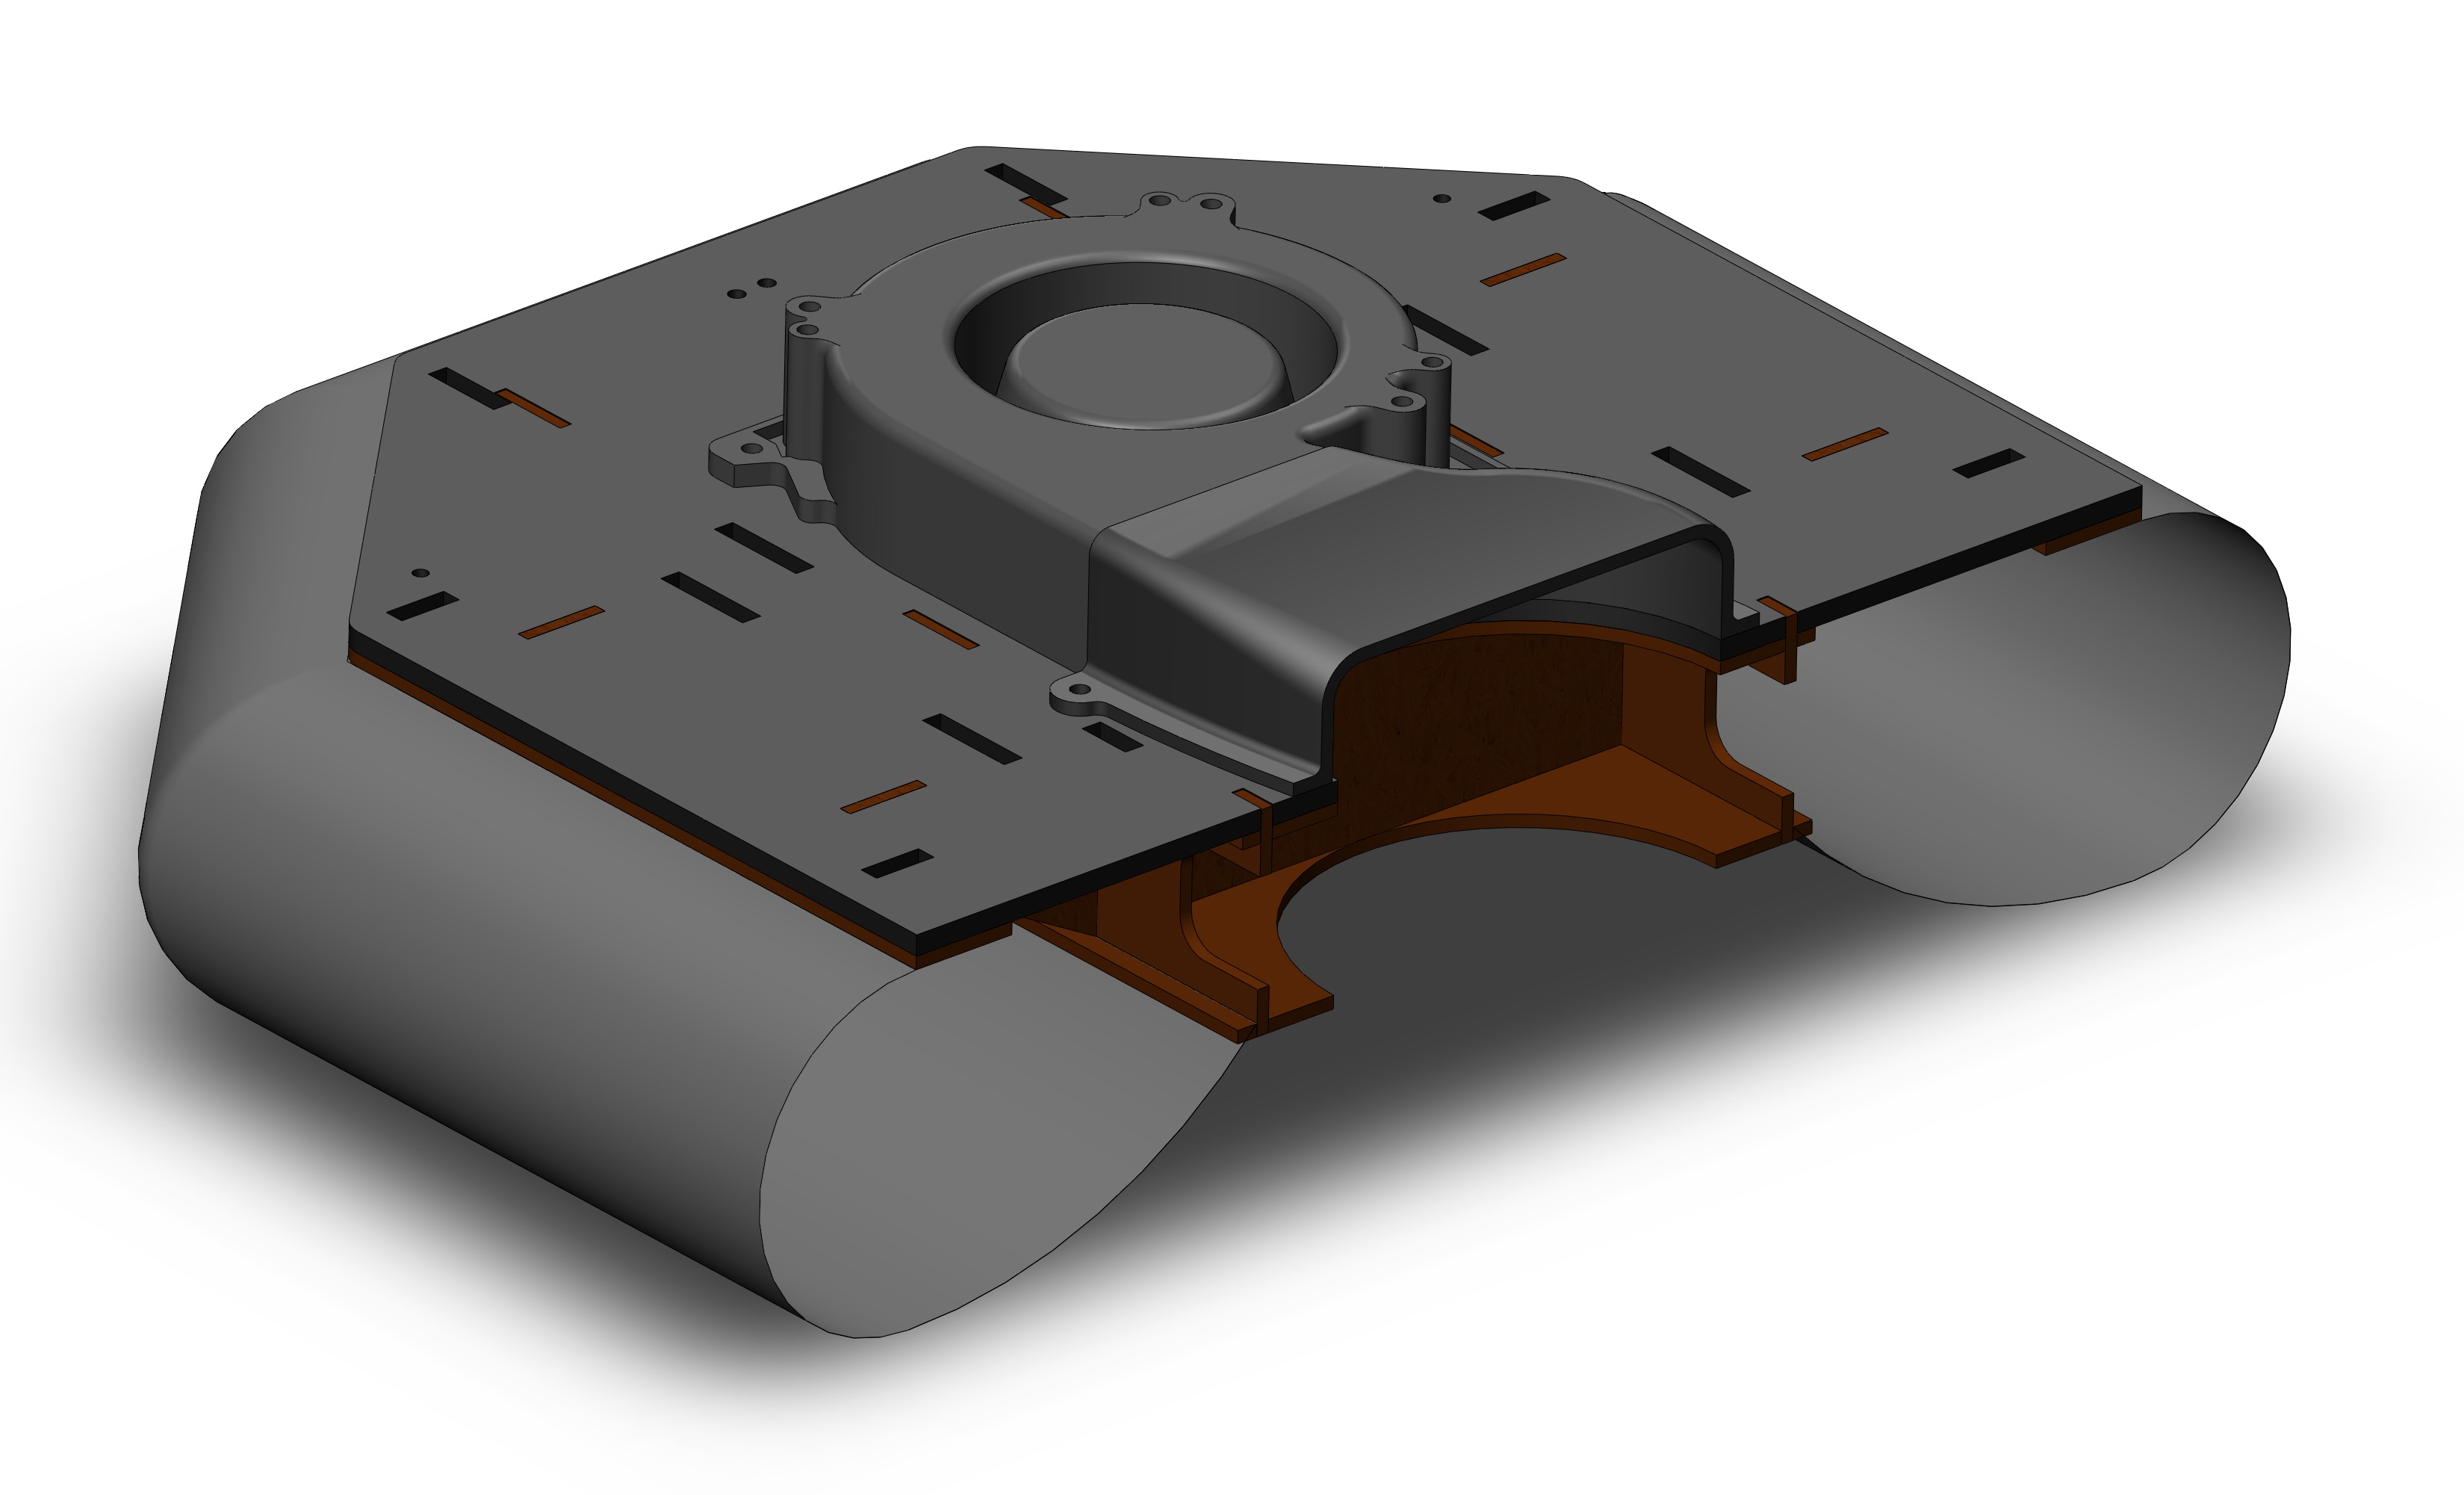
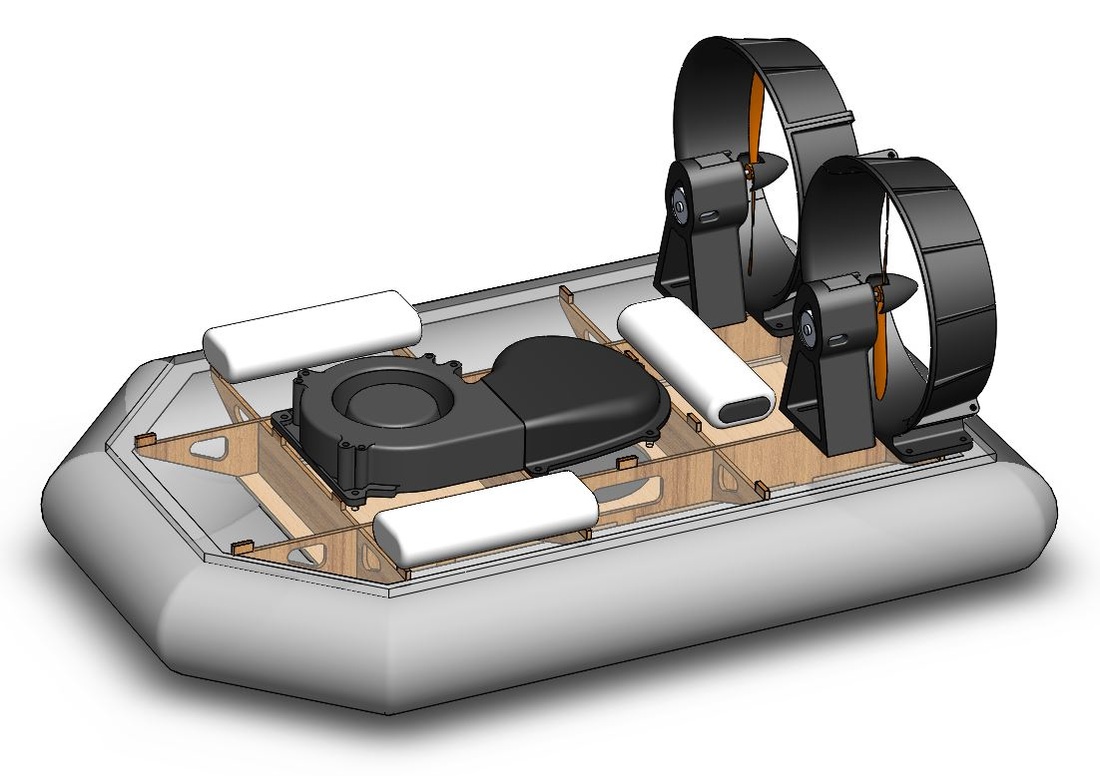
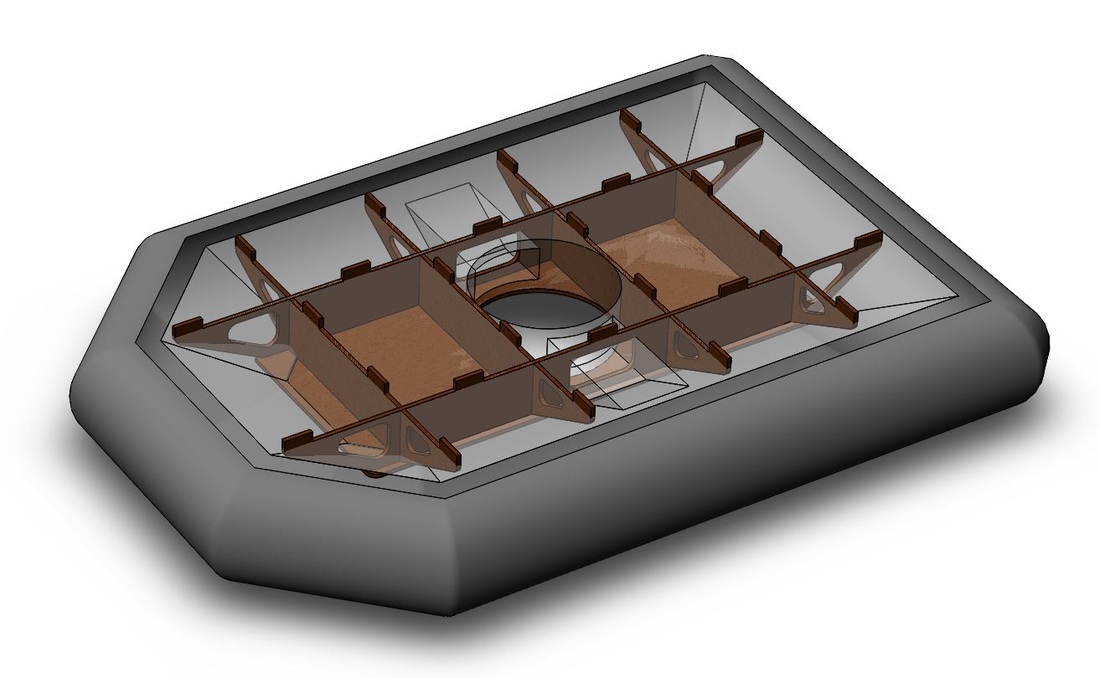
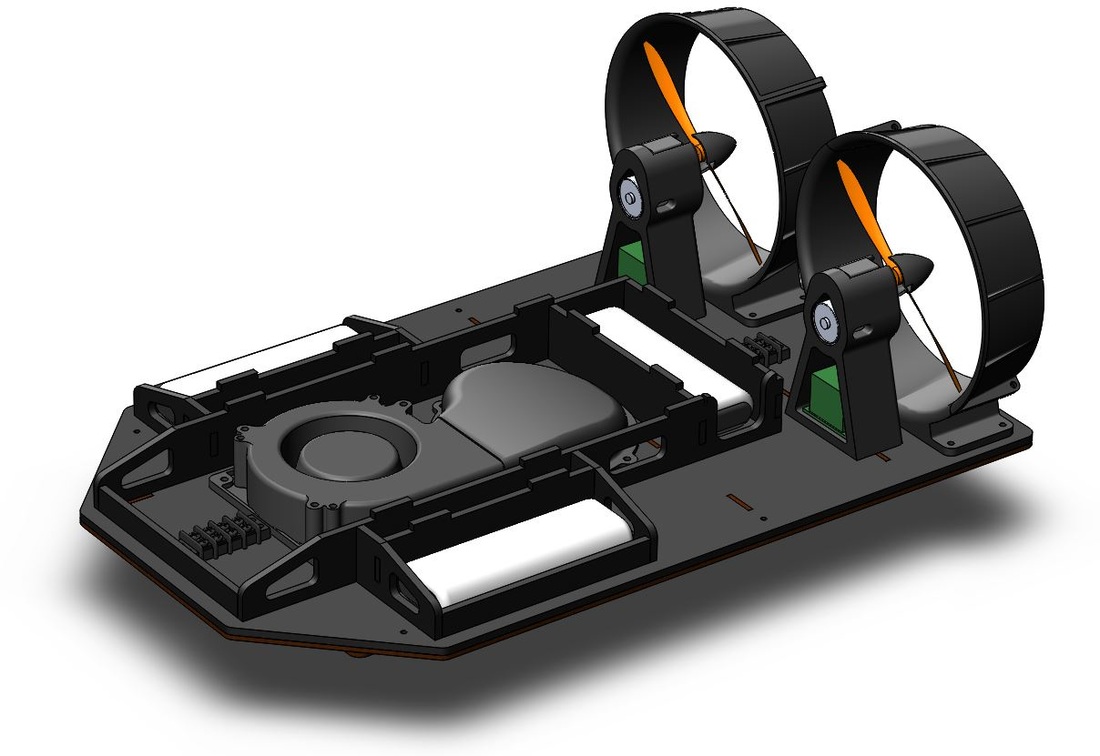
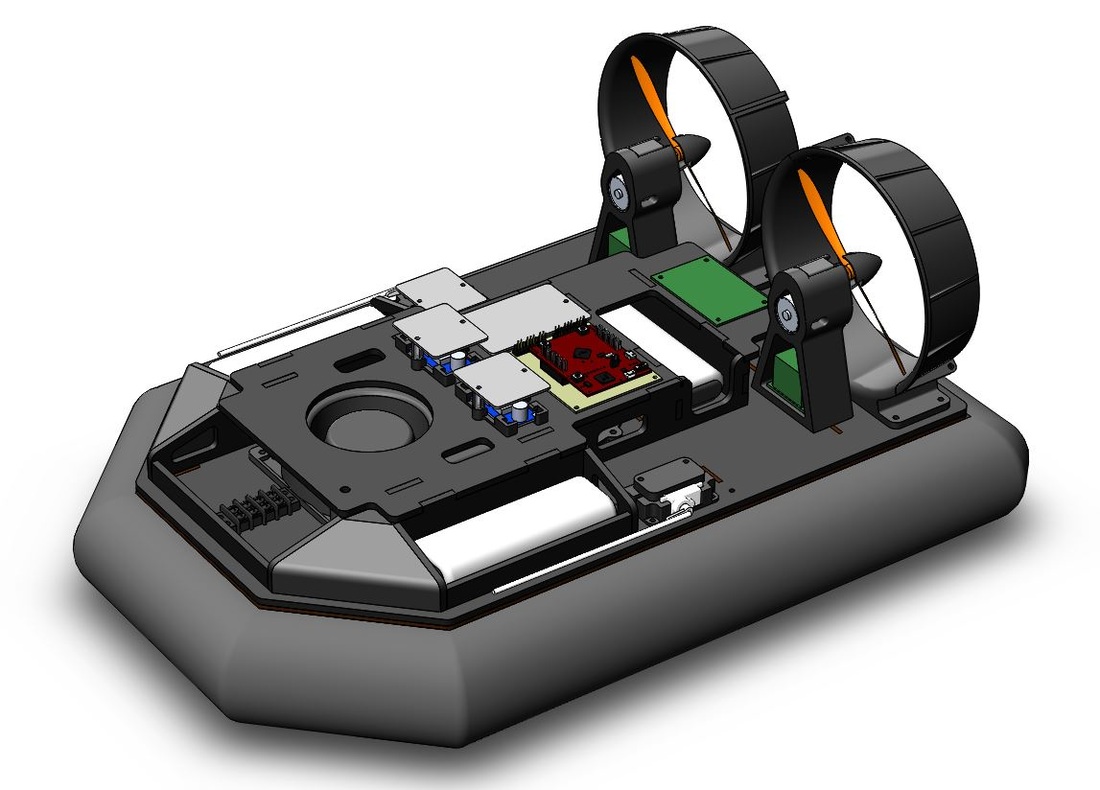
CAD cutaway of the final version of our hovercraft; note the 'air box' in the center, responsible for distributing air to the skirt and cushion
|
Bag Skirt Design FundamentalsAmong hovercraft skirt designs, the bag skirt approach is unique in that the pressurized airflow from the lift fan is split among two independent volumes: the air cushion beneath the craft, which provides lift; and the enclosed volume 'loop' contained by the bag skirt. This stands in contrast to simple wall skirts, where all of the pressurized airflow is directed to the air cushion.
Since the design consists of an inflated loop around the outer rim of the craft, bag skirts exhibit very little to none of the noisy and inefficient skirt flutter that plagues wall skirt designs. Moreover, bag skirts are more stable in roll and pitch and are less vulnerable to uneven surfaces compared to wall skirts. Intuitively, the pressure in the skirt must be equal to or slightly higher than the pressure in the air cushion. The pressure differential between the two volumes directly influences hovercraft performance, with a tradeoff between stability and uneven-surface performance. Guidelines (such as this one) for designing bag skirt geometries can be found online. |
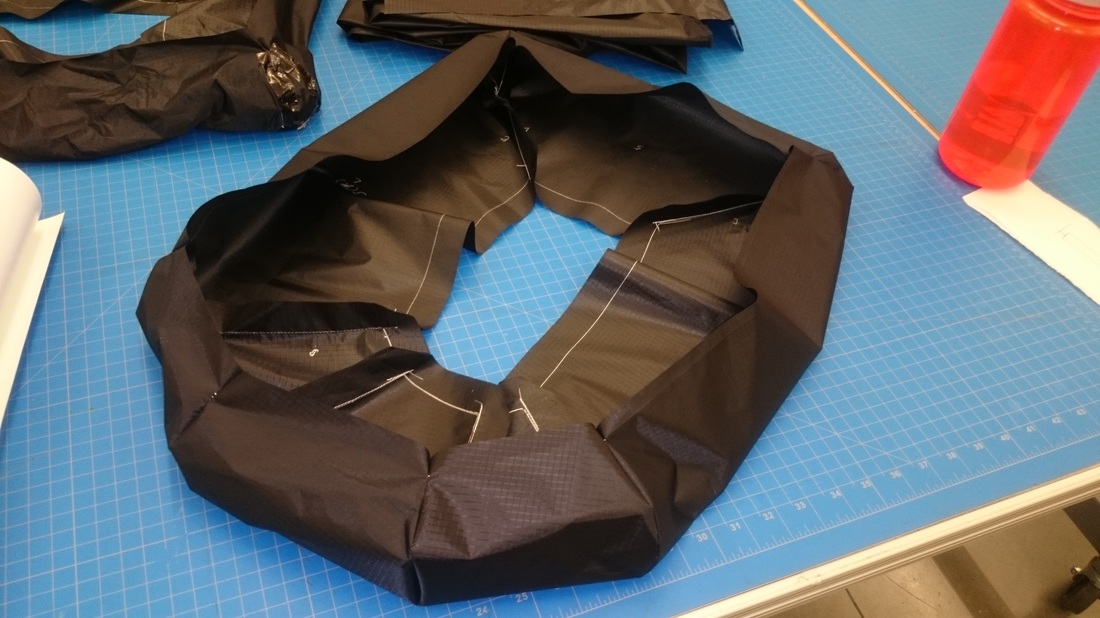
Skirt Pattern DesignThe main obstacle in designing an efficient bag skirt is the nontrivial geometry of the inflated skirt. Optimum stability requires a design with minimal kinks and folds in the skirt fabric, which in turn demands a precisely cut and assembled fabric pattern.
To achieve these goals, we designed the bag skirt using SolidWorks by modeling its inflated state as a solid body. We then used surface-modeling tools to 'unfold' each segment of the skirt to produce a flat pattern. For the prototypes, the pattern pieces were taped together to recreate the three-dimensional skirt geometry. |
|
|
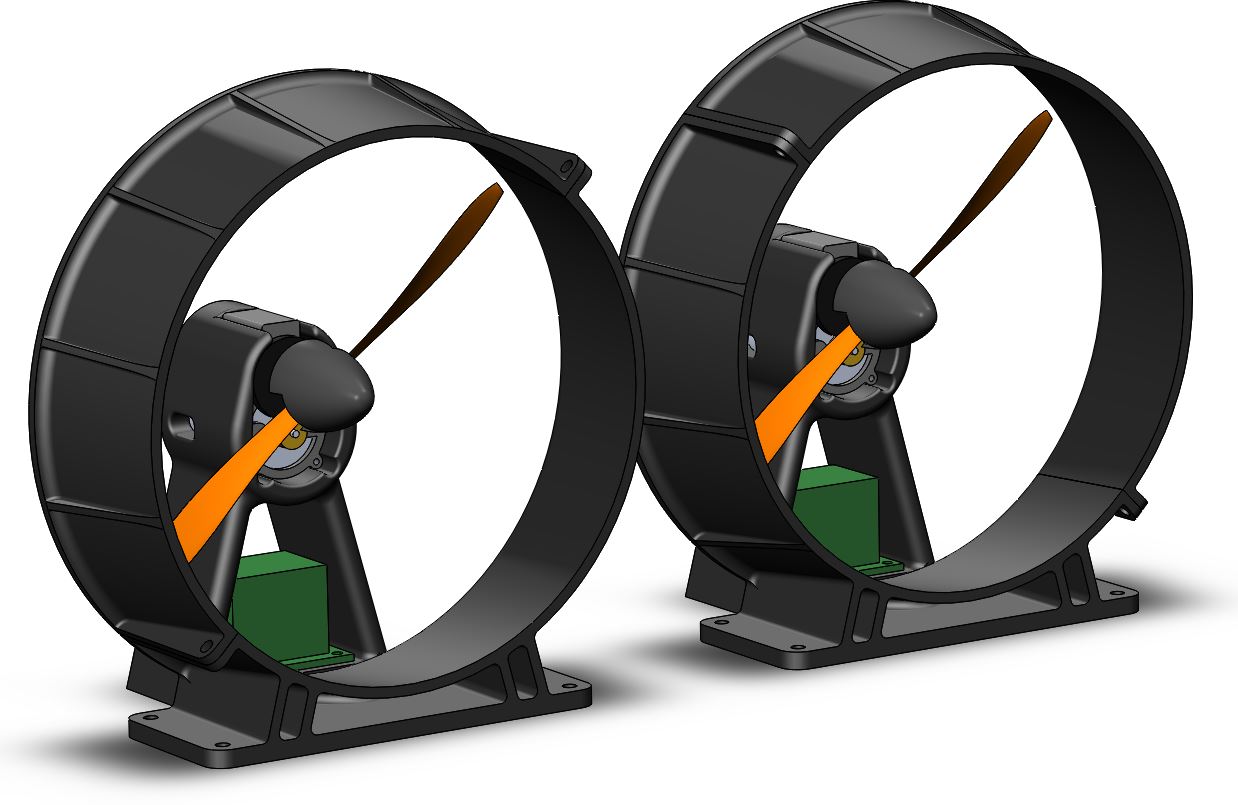
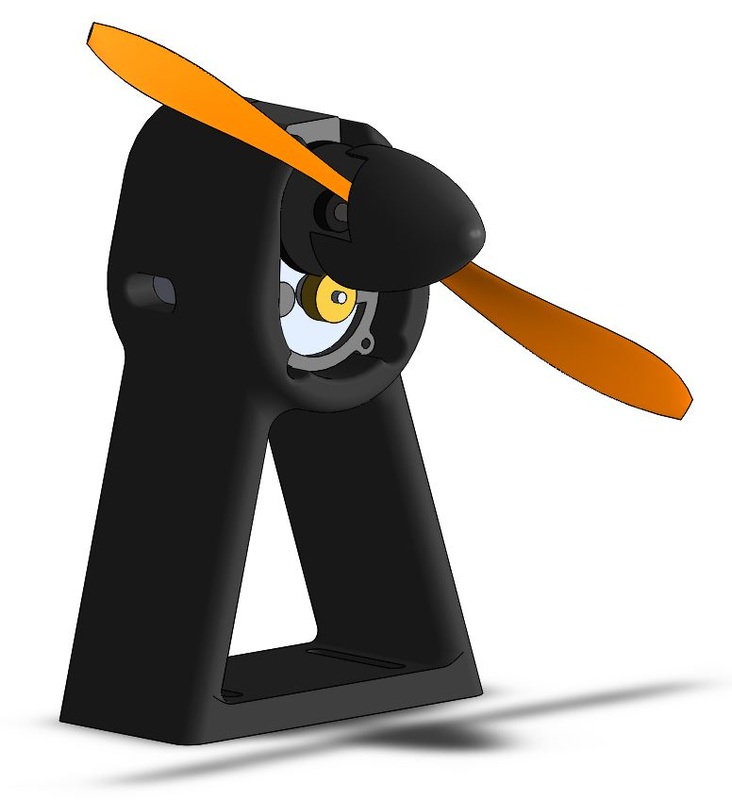
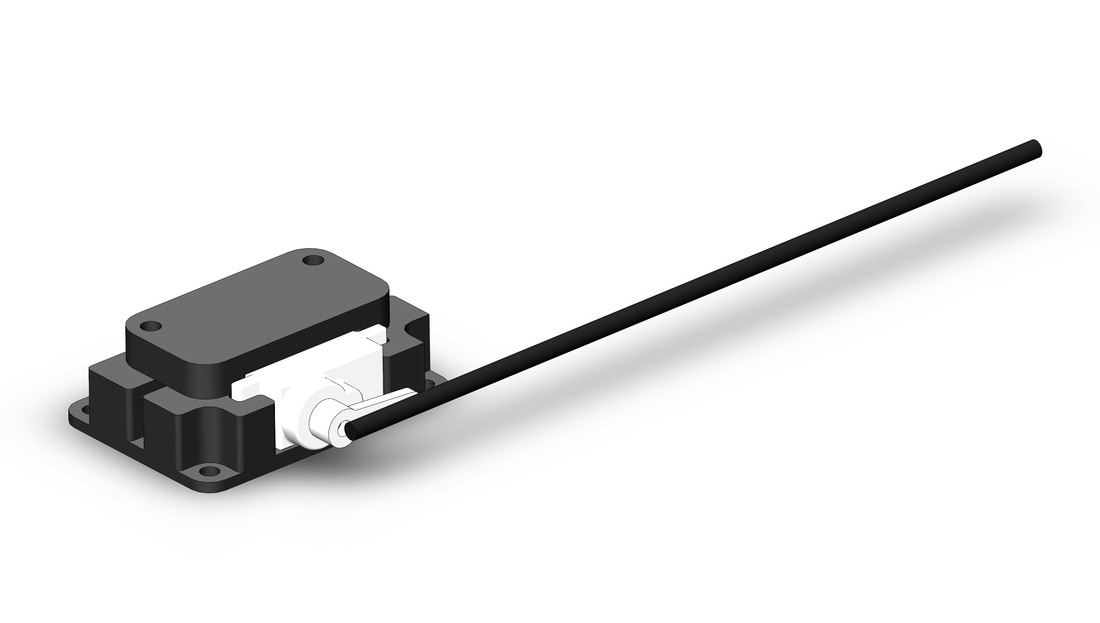
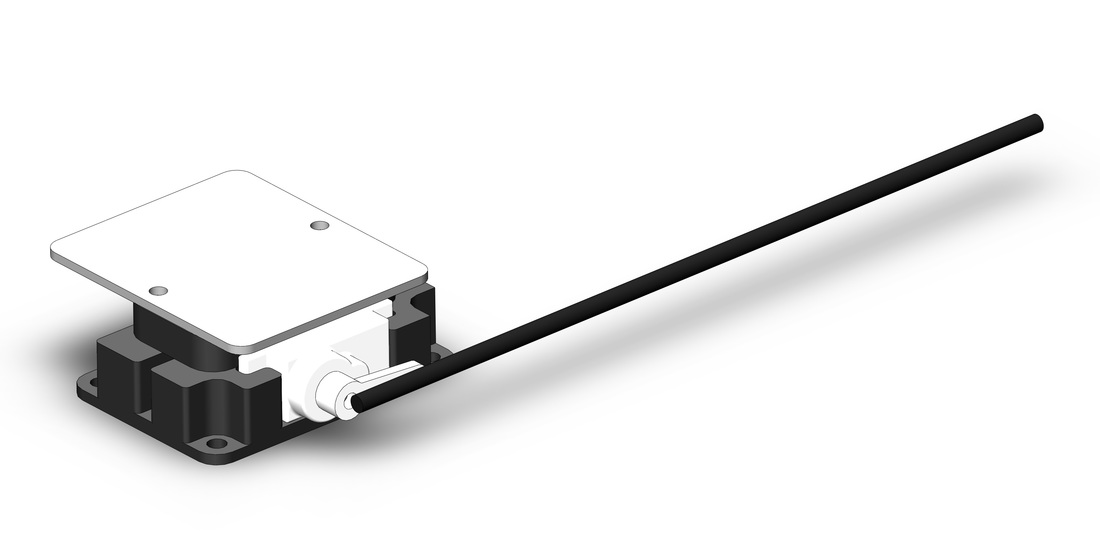
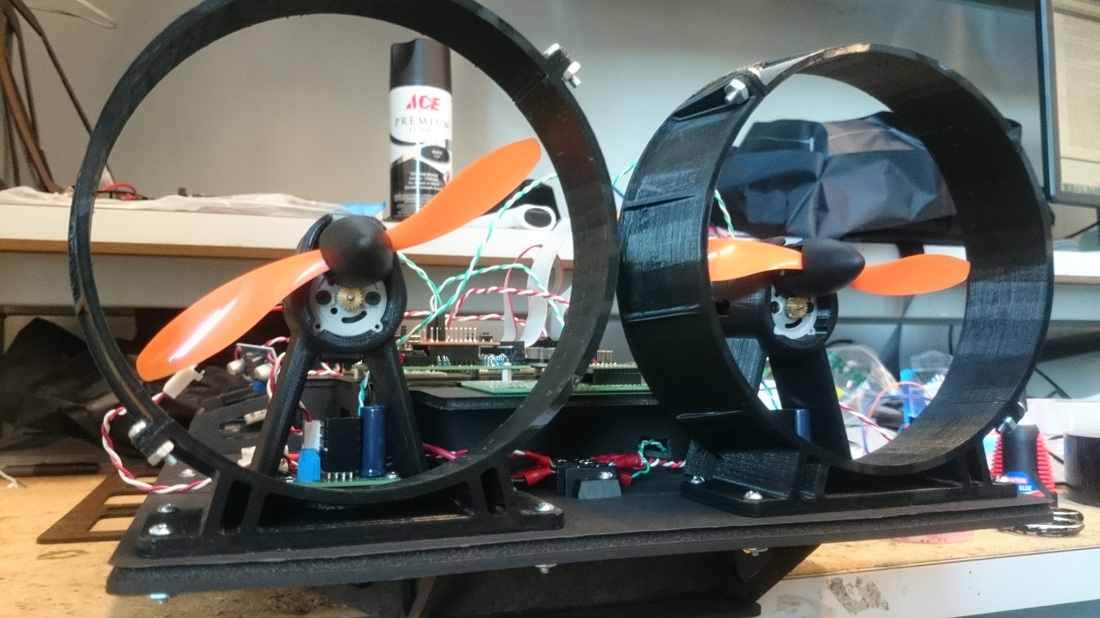
Propulsion DesignWe opted to use two independently-controlled propellers to implement differential-thrust turning. After a visit to AeroMicro, a local RC airplane vendor, we selected pair of 7.2V DC brushed motors so that we could run our hovercraft backwards as well as forwards.
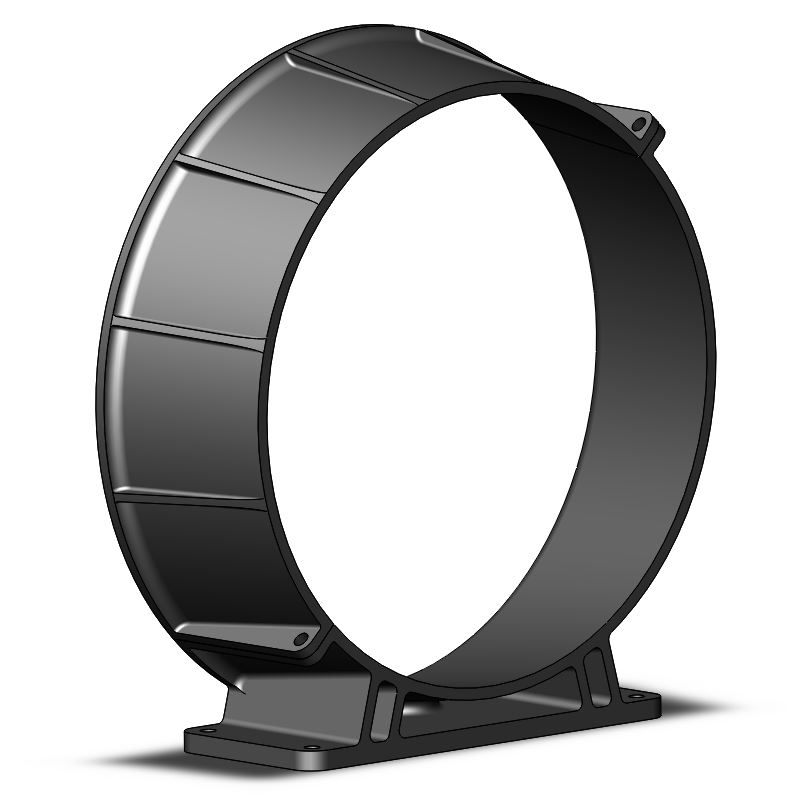
To mount the motors to the hovercraft, we designed a custom 3d-printed plastic shroud., with provisions to compactly mount a TLE5206 motor driver circuit in order to save space. In addition, we designed a propeller shroud – also 3d-printed – to protect the propellers from errant impacts and to maximize thrust. To squeeze more thrust out of our propellers, the shroud was designed with a 15% reduction-in-area from inlet to outlet, with a very tight clearance between the propeller and shroud (a mere 3 millimeters). |
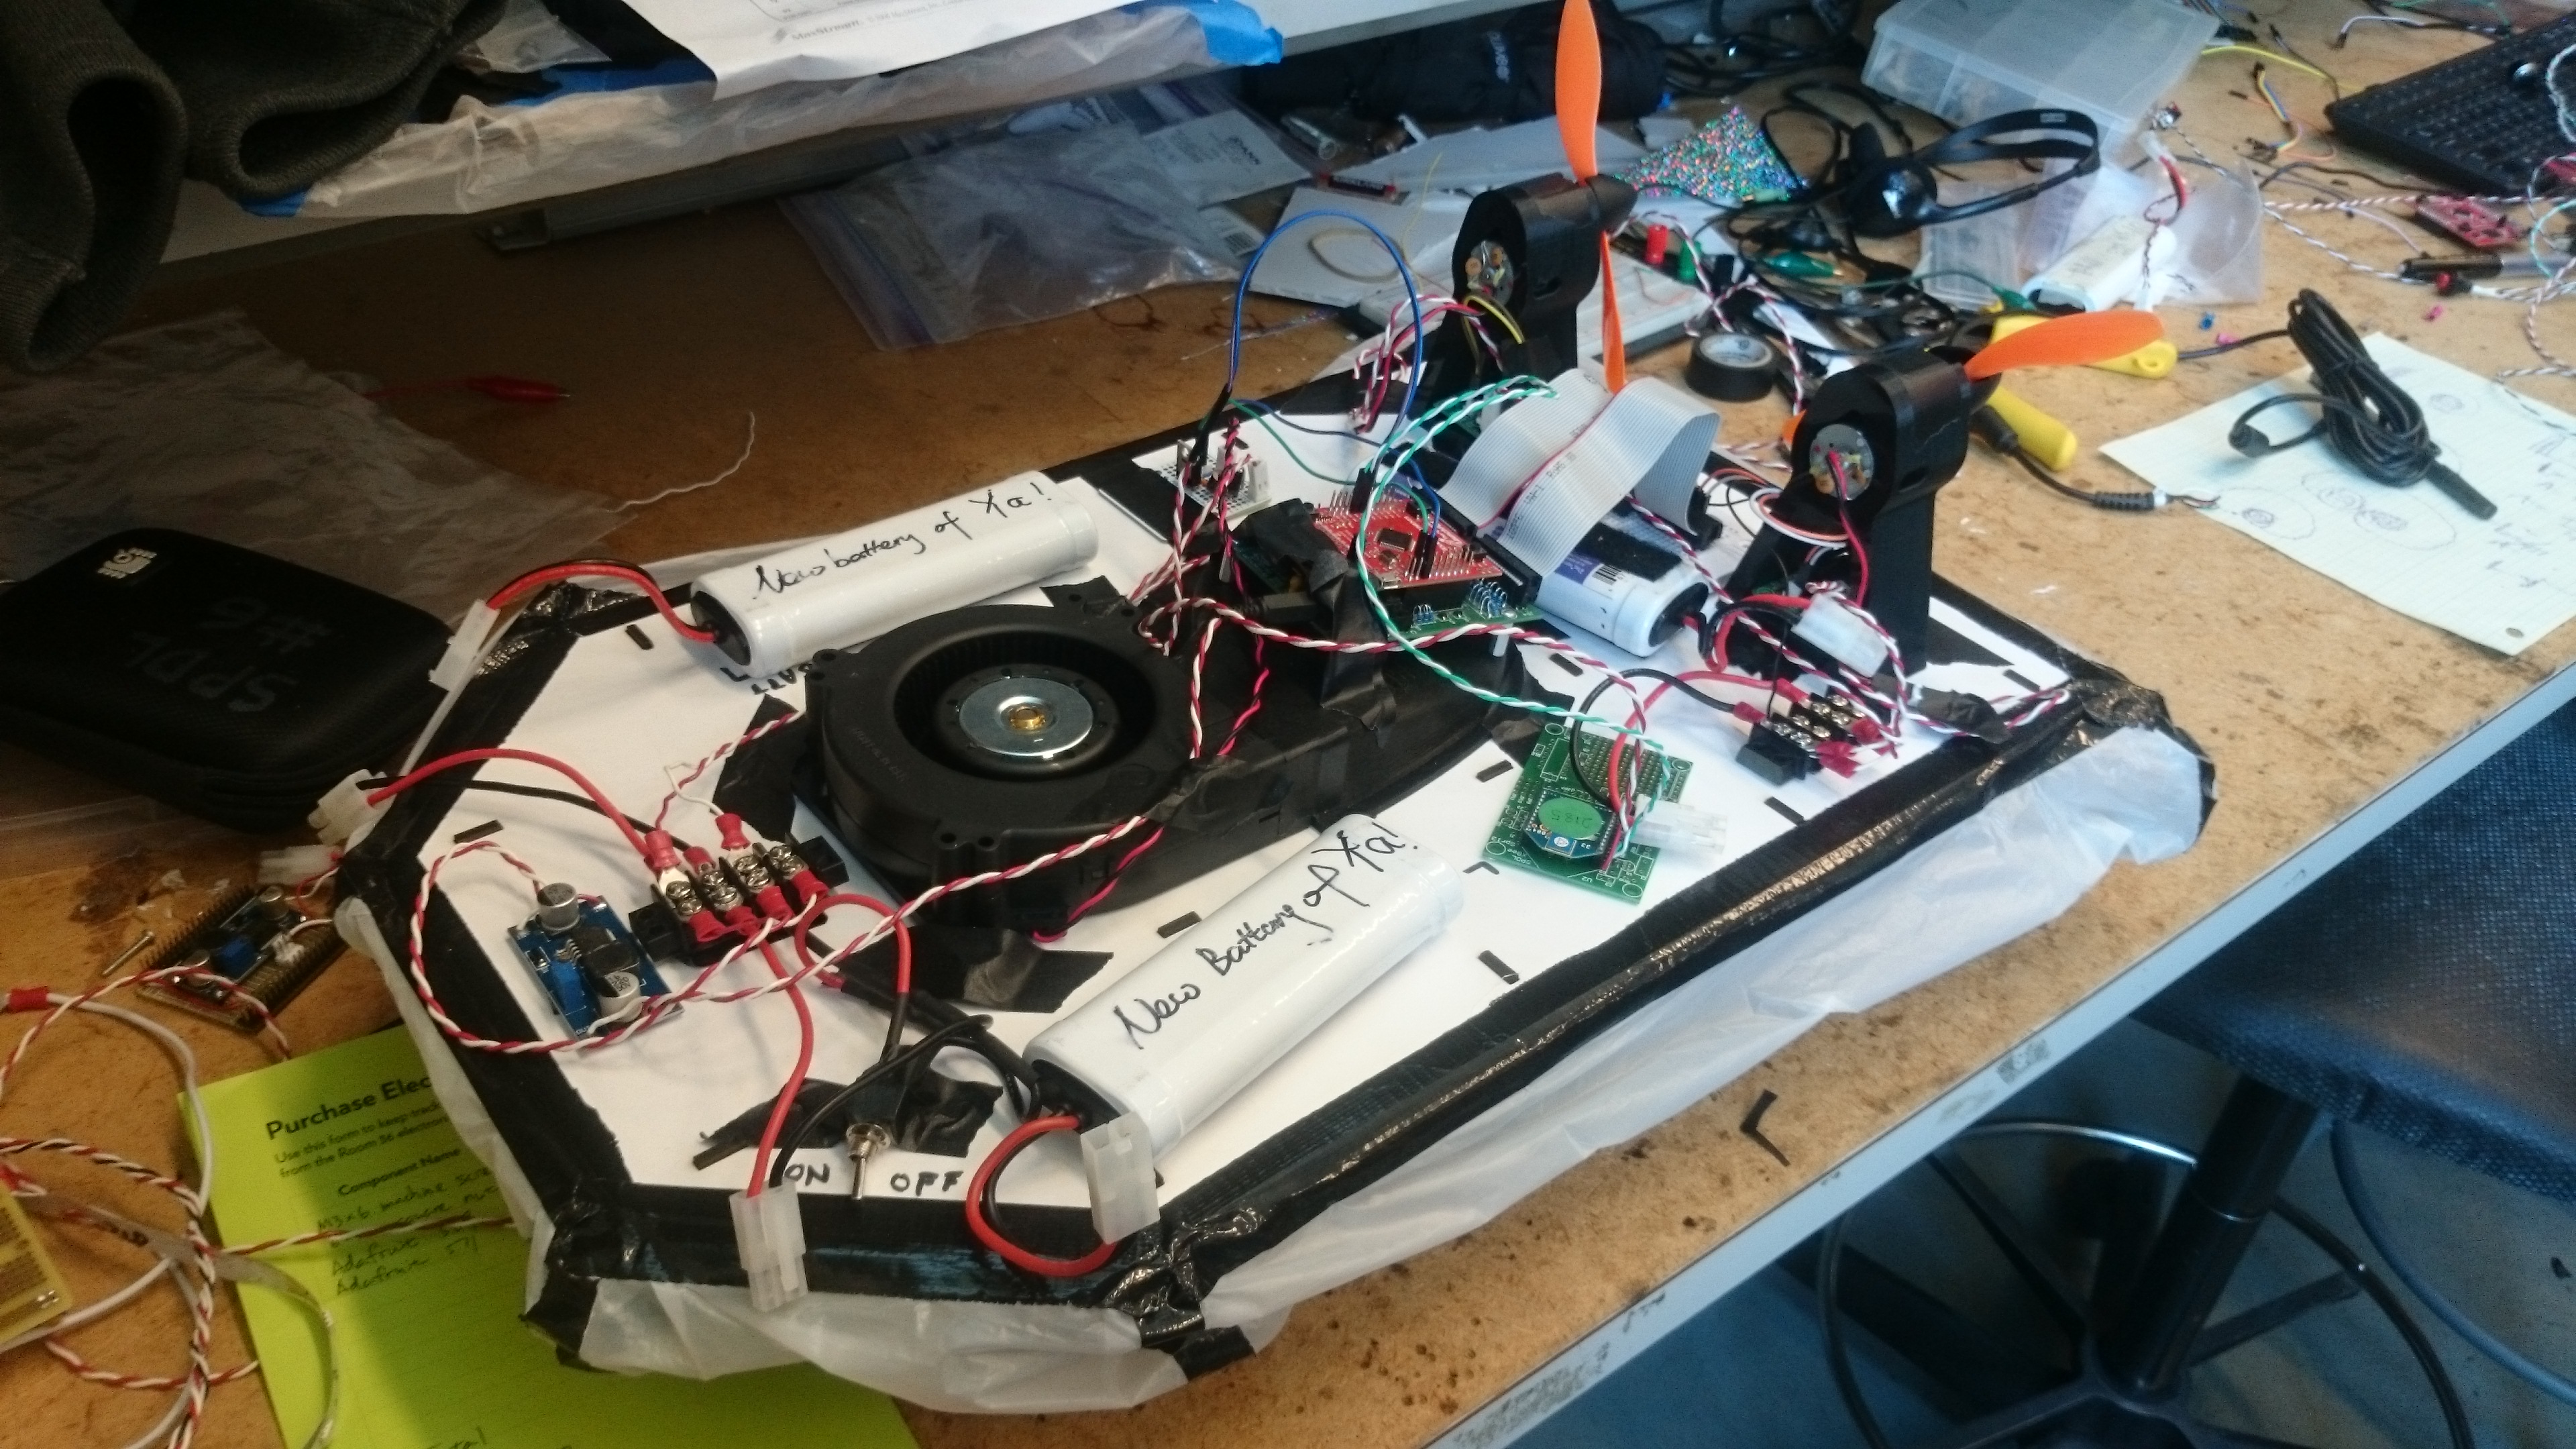
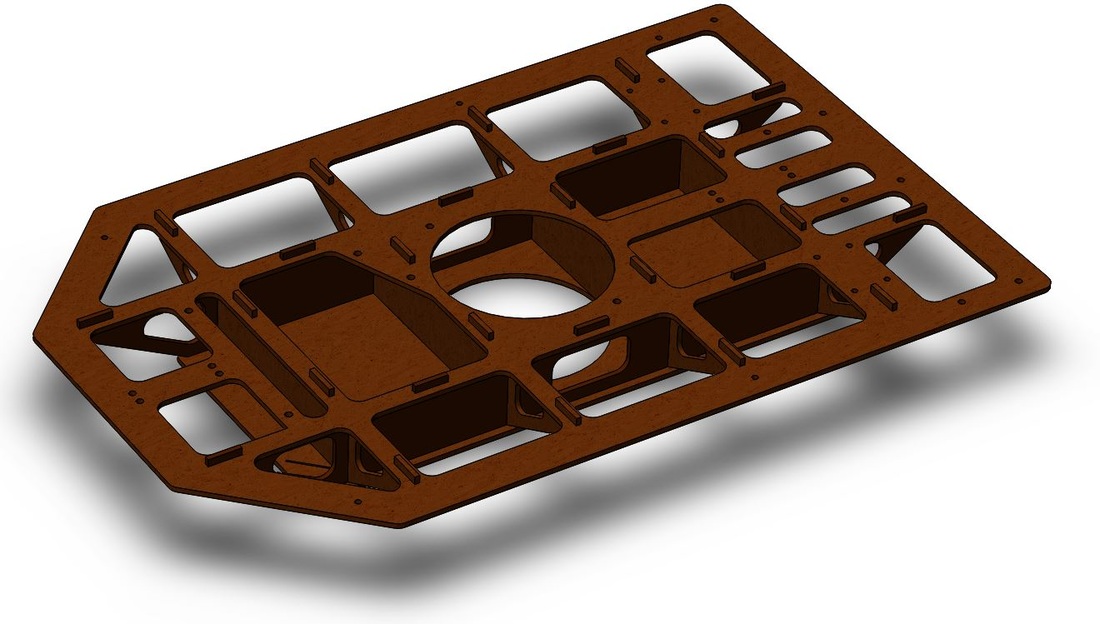
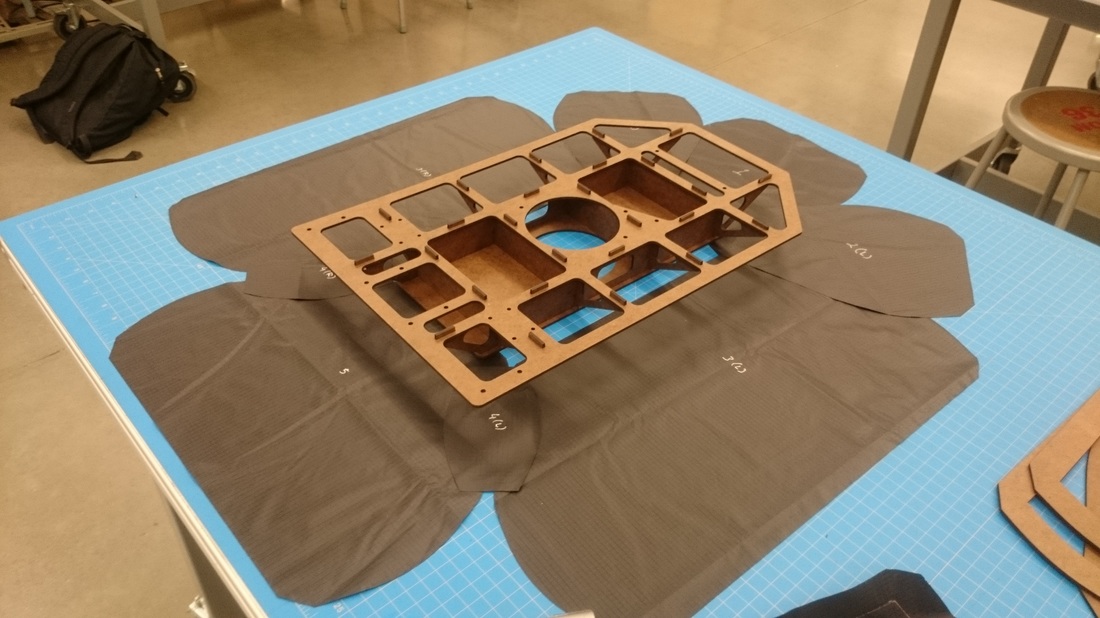
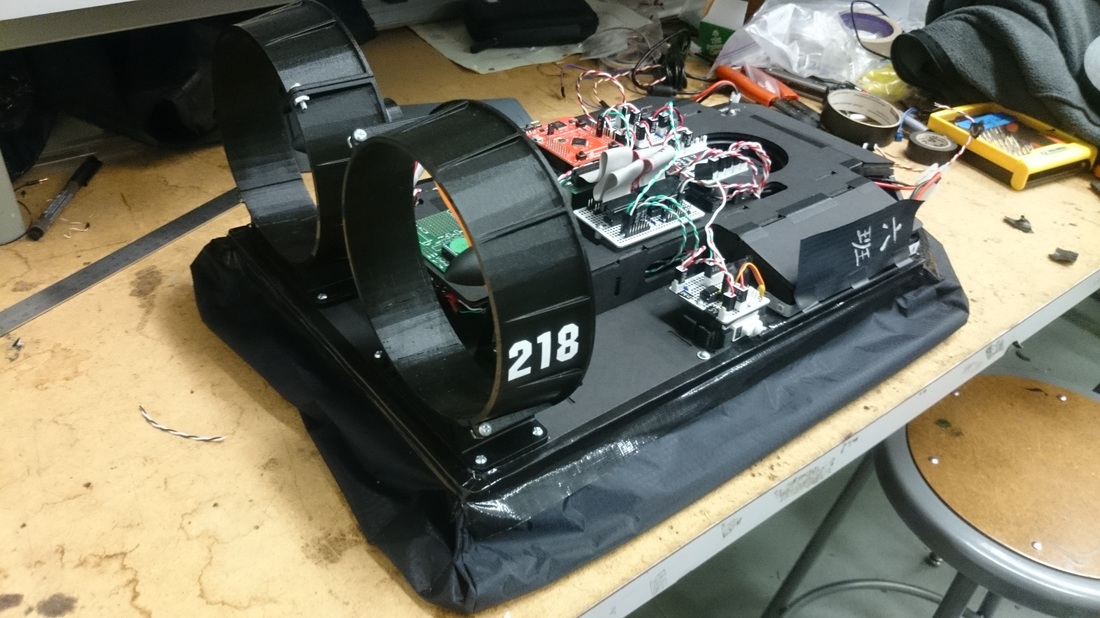
Second PrototypeOur Mark 2 prototype was built with most of the design features that would be used for our final version, such as an experimental bag skirt, a laser-cut fiberboard box frame that doubled as an air box, and a foamboard electronics deck. It also incorporated all of the hardware - propulsion, wireless communications, soldered circuitry, battery power distribution - necessary to achieve all of the checkpoints up to the final grading session.
Mark 2 also served as a testbed for experimenting with weight distribution and finalizing major component placement. One key takeaway from our tests was that hovercraft stability could be maximized by locating the batteries - probably the most dense components on the hovercraft - as far away from the center of mass as possible. |
|

|
|
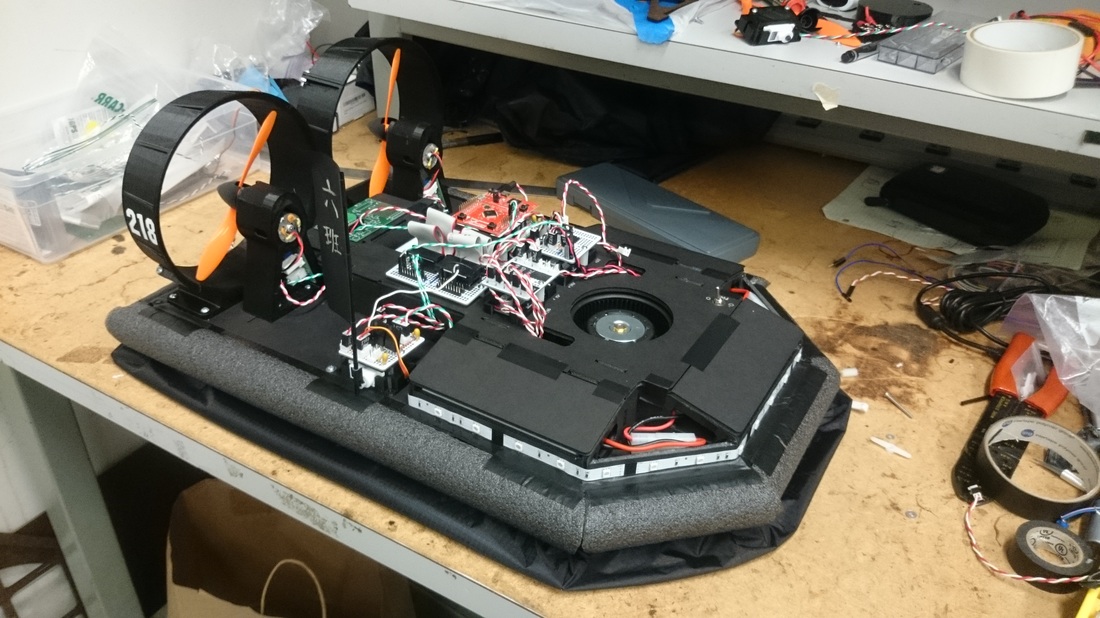
Final Version DesignMark 3, the final version of our hovercraft, was designed to be functionally identical to Mark 2. For Mark 3, the skirt was designed first, with the frame being built up on it to ensure that the hull sat as evenly on the air cushion as possible. Based on component placement finalized on Mark 2, weight distribution was fine-tuned in SolidWorks to place the center of mass directly atop the center of lift.
As with Mark 2, the electronics and propulsion hardware were all mounted on a foamboard deck fastened to the frame. Mark 3 additionally featured a fiberboard backboard for the deck so that major components could be bolted directly to the frame through the deck. |
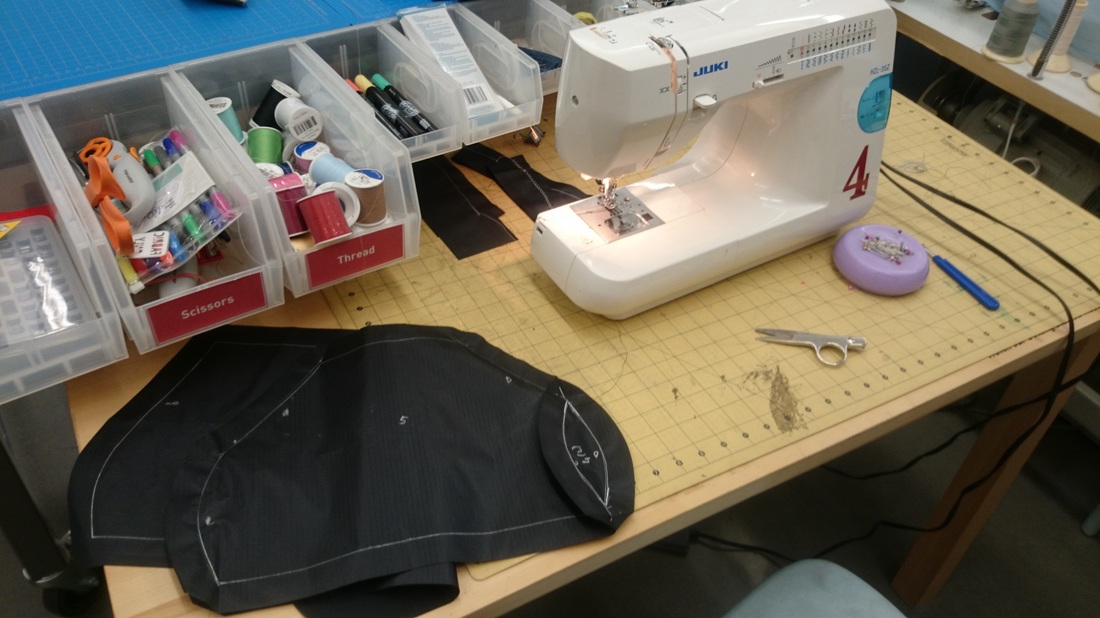
Bag Skirt Final AssemblyOur Mark 3 hovercraft was designed to be fitted with a skirt sewn from ripstop nylon fabric - a step up from the previous versions, which used HDPE garbage bags assembled with duct tape.
As with the prototypes, SolidWorks was used to generate a flat pattern. We then used the laser cutter in PRL Room 36 to accurately and rapidly cut the nylon, complete with sewing margins. The pieces were assembled using the sewing machine in Room 36. Once complete, we used double-sided tape to attach the skirt to the underside of the Mark 3 hull. |
|

|
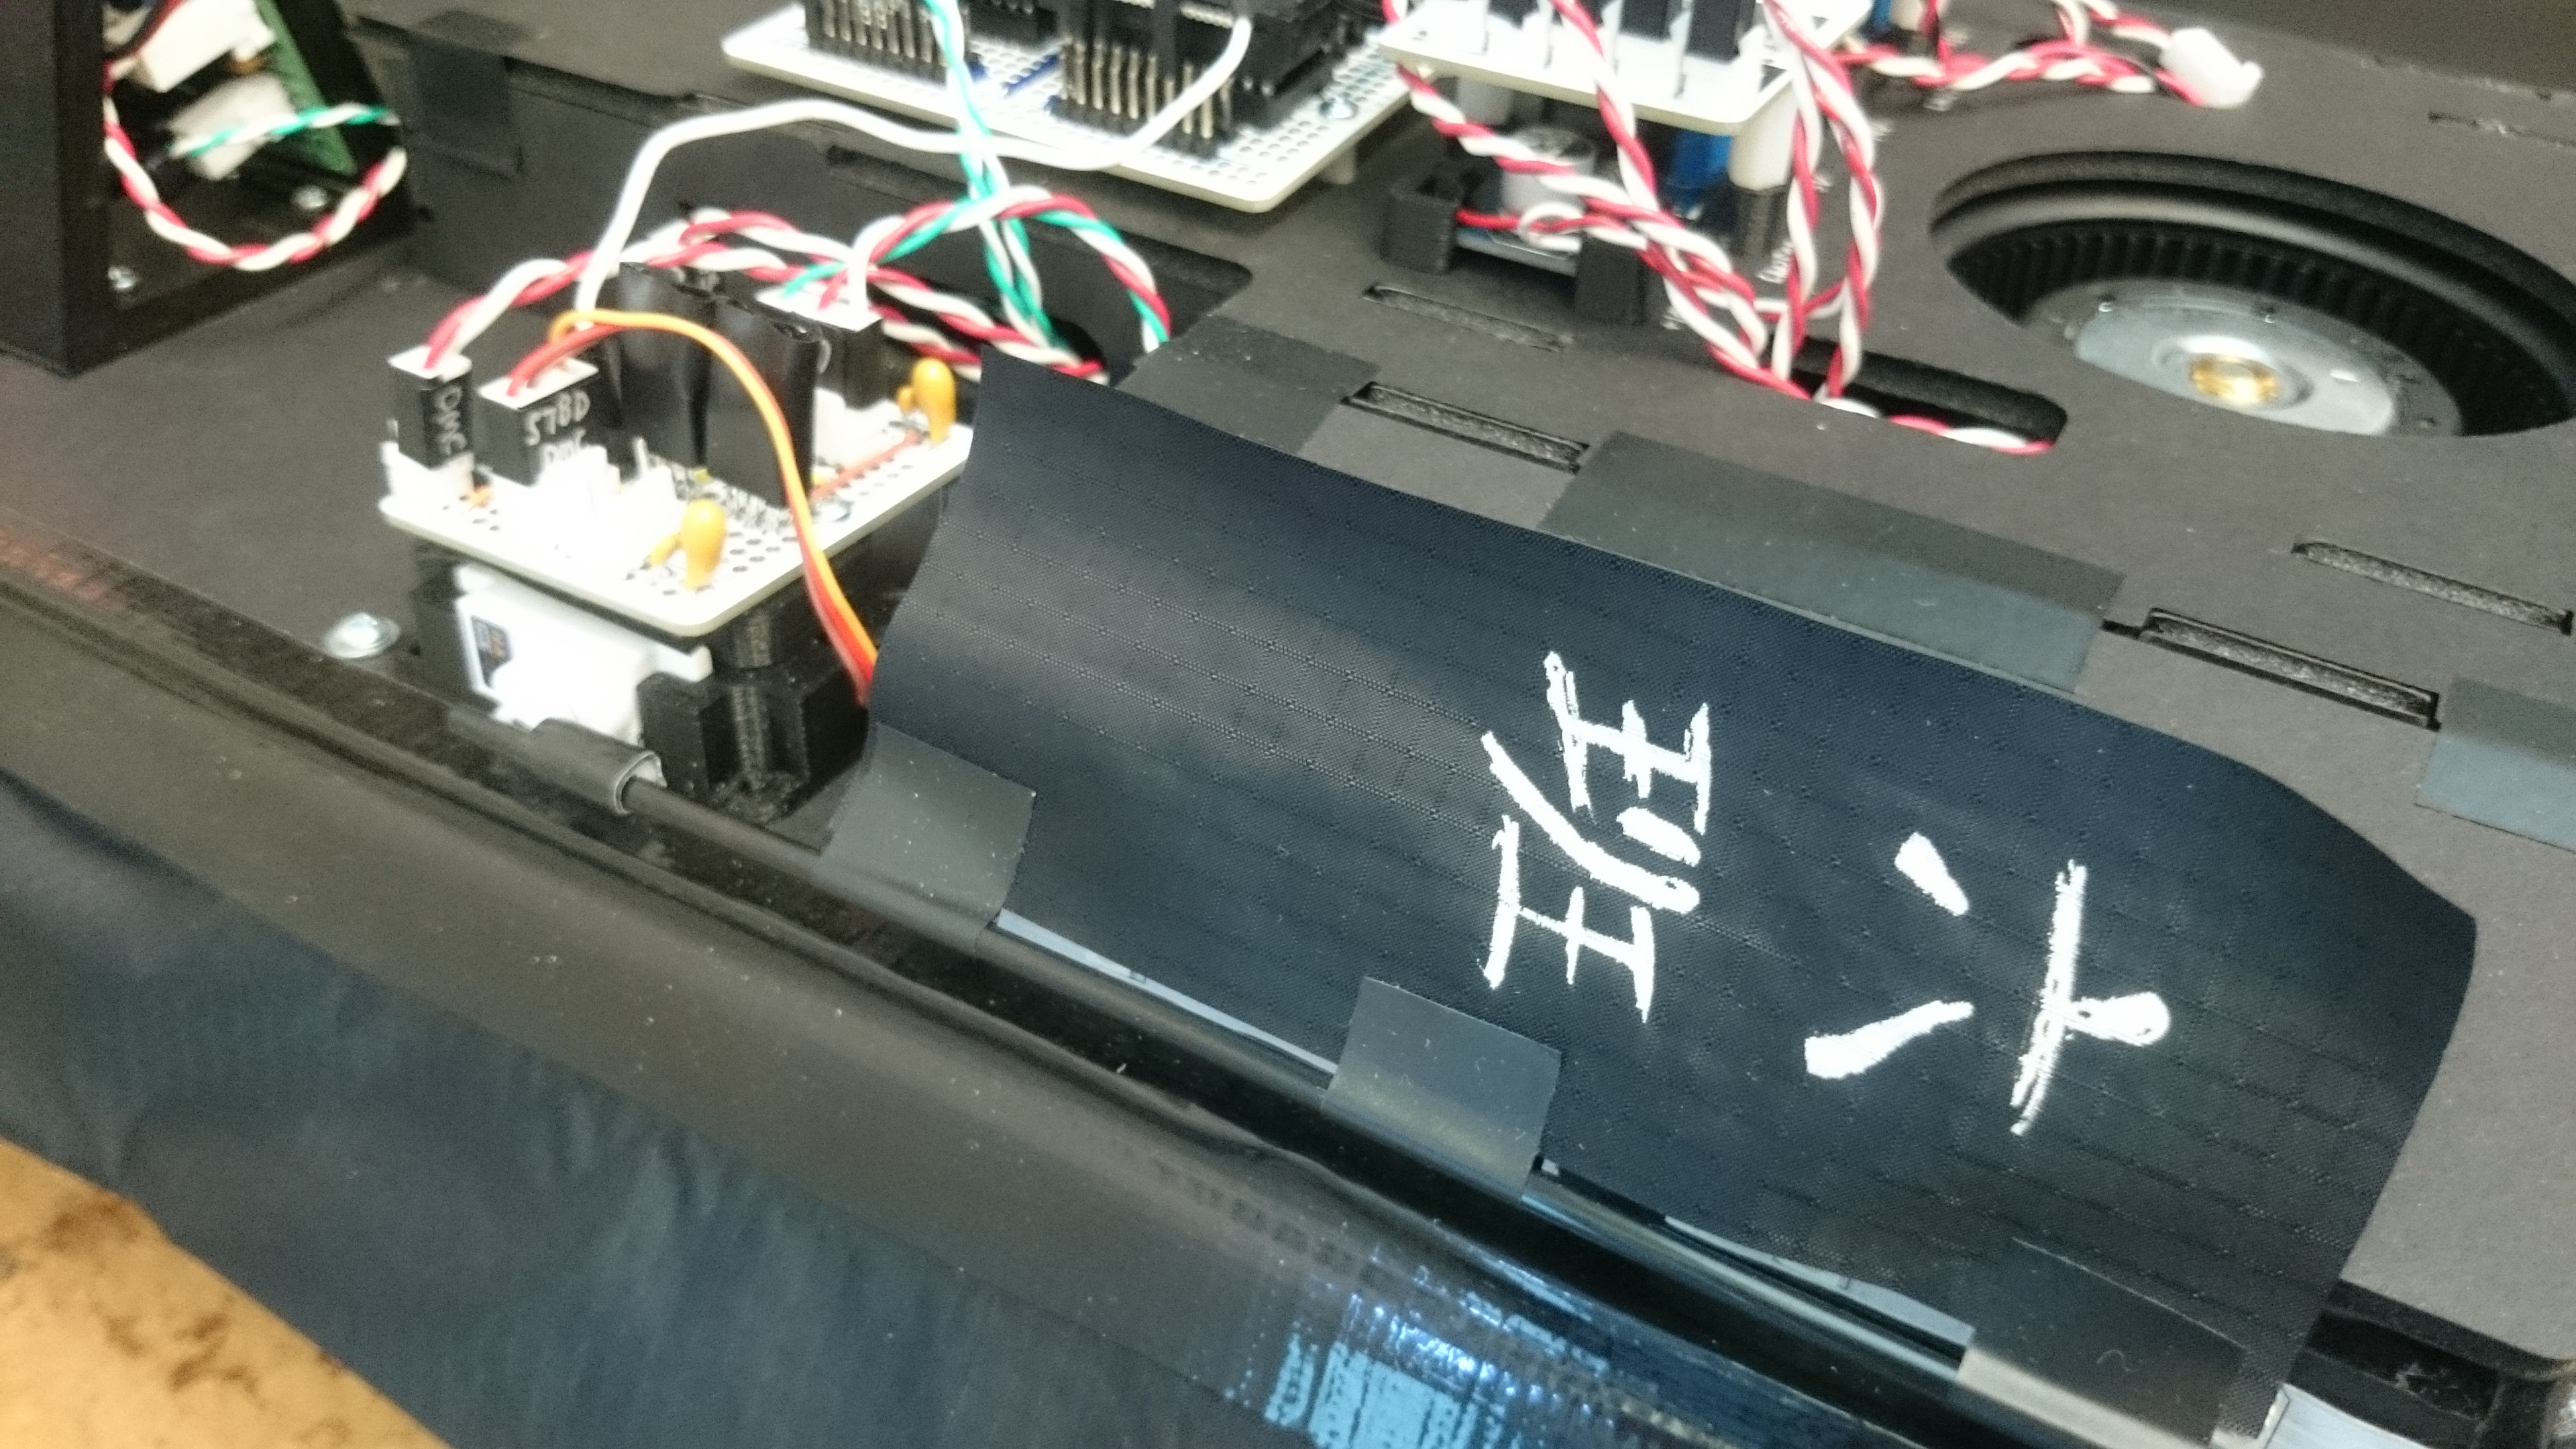
Display of Memory and CommitmentThe Display of Memory and Commitment (DMC) is a subsystem required by the project prompt specifications, serving as a gameplay status indicator. Operated entirely from a PIC12F752 8-bit microcontroller programmed in assembly language, the DMC displays the LOBBYIST hovercraft's current team allegiance (red or blue), indicates whether it is paired with a PAC controller or not, and provides an indicator of the pairing time remaining.
Our LED consists of a servo-powered flag and an RGB LED strip. On pairing with a PAC, the LEDs light up red or blue, depending on the team allegiance chosen on the paired PAC. Simultaneously, the servo raises the flag, which gradually lowers as the 45-second pairing timer runs.\ The DMC flag was fashioned out of spare nylon fabric from our skirt build, and bears the Chinese characters 六班, meaning 'Team 6.' |
Final Version BuildThe Mark 3 hovercraft was built in three intense shop sessions and two days of meticulous assembly. The hull, frame, and skirt were built using duplicate components while Mark 2 was being used for checkpoints, so that crucial components could be transferred immediately upon completing the Project Preview. This meant that our final assembly was operational the day after we completed our penultimate checkpoint.
To our collective relief, Mark 3 hovered and maneuvered beautifully on the first try. Despite a major electronics hiccup (resulting in several IC casualties), we breezed through the final grading session with flying colors as part of the very first pair of teams to finish the project. |
|

|
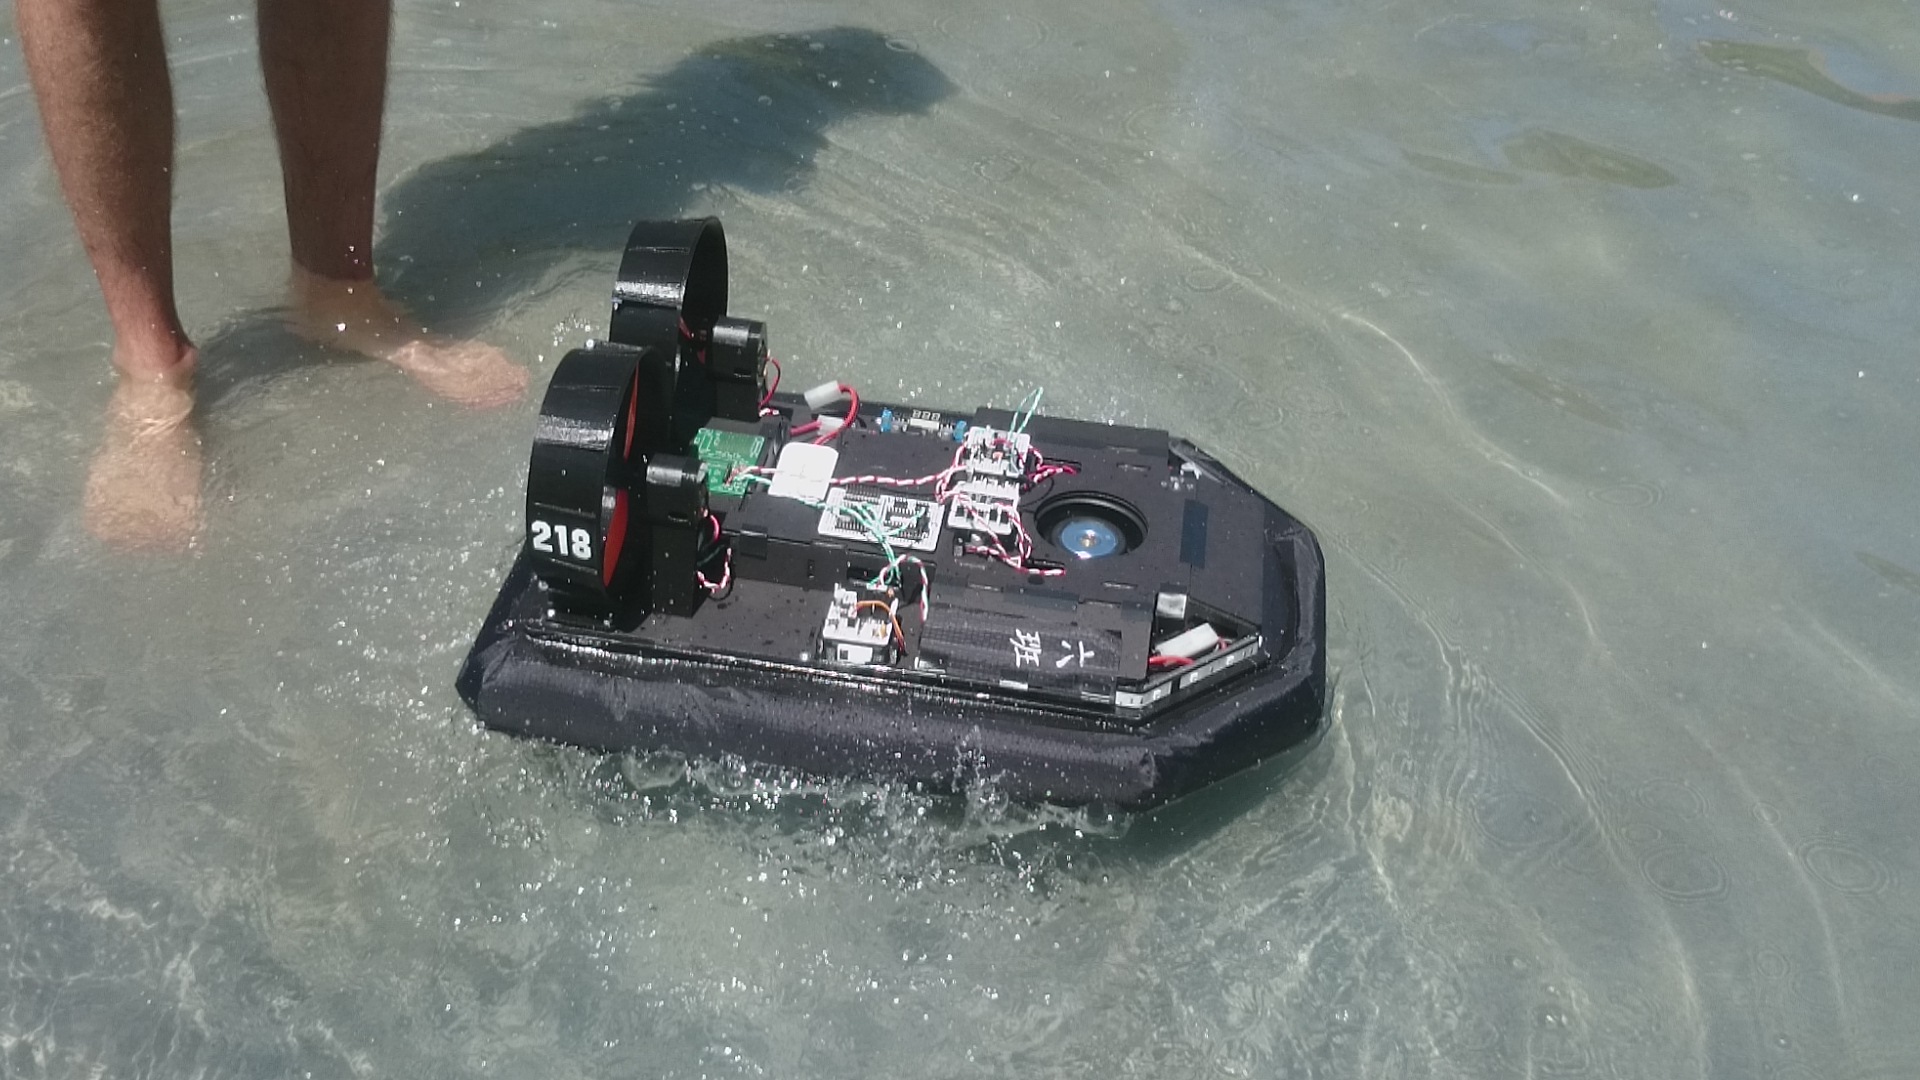
Bonus: Hovering on WaterAs part of our post-project shenanigans and to commemorate the 'end' of the California drought, we did what any reasonable engineering team would do: we threw our hovercraft into the Terman Fountain pool.
To our surprise (and relief), it turned out that, in fact, our hovercraft design could float! In fact, it floated quite well with surprisingly low friction, happily drifting around the fountain pool (before we hurriedly pulled it out so as to avoid shorting our exposed electronics). |
